You may want to replace your toilet tank if it’s damaged, leaking, or simply outdated. Luckily, toilet bowls and toilet tanks are sold separately, so it is quite easy to get a new tank and install it in your bathroom.
Before installing a new toilet tank, you first need to remove the old one safely. You should drain it, remove it from the wall or the toilet bowl it’s attached to, and detach it from the pipe. Then, you need to place the new tank properly to ensure that it holds the water inside so you don’t end up flooded on the first flush.
In this article, we are going to teach you exactly that: how to safely remove the old tank and install a new one, step by step.
How to Remove the Old Tank
Before installing the new tank, we need to remove the old one first. Here’s how.
Cut Off Toilet Water Supply
Find the water valve for the toilet that is connected to a hose. It is usually somewhere at the bottom of your toilet tank. To cut off the toilet water supply, you should turn the valve handle counterclockwise. Make sure that you turn it tight so that the tank doesn’t fill up with water anymore.
Flush the Toilet
The next step is to drain the tank. First, remove the lid to see the water levels. Press the flushing lever and let the water drain. Hold the lever until all the water is out. If some water remains inside, try draining it with a sponge.
If you see that the tank is filling up with water again, that means that you didn’t close the valve properly. In that case, repeat the procedure, and make sure that the valve is completely shut off.
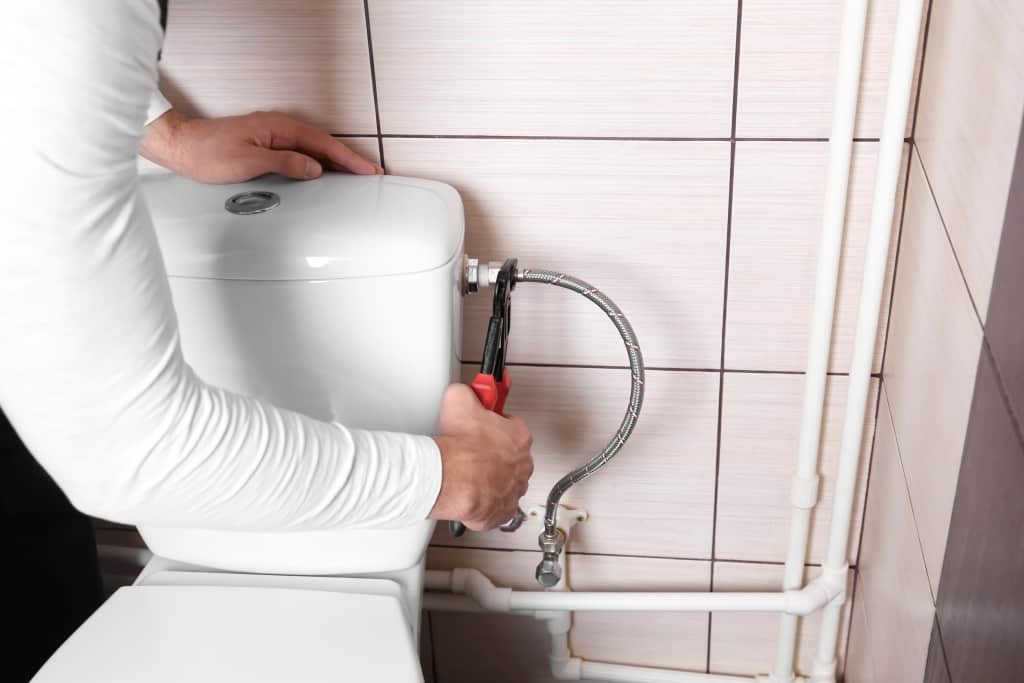
Detach the Tank from the Hose
Once the water from the tank is completely out, it is safe to detach the tank from the hose. The hose connects the bottom of the tank to the valve in the wall and is usually made of plastic or metal.
More often than not, it is possible to unscrew it by hand, but if you can’t (e.g., in case of rust), you may need to use a large french key or pliers.
Have a towel or a mop nearby, as the water left in the hose may leak around.
Unscrew the Tank
Outside the tank, you will find the ends of the bolts that you need to unscrew with a pair of pliers. As you grip the outer part below the tank with pliers, reach inside the tank with your other hand and insert a screwdriver in the bolt head and unscrew. Repeat until it becomes loose and you manage to pull the bolt out. Do this for each bolt (up to three per tank usually).
Once you’ve unscrewed the bolts, you can lift the tank up and remove it from the pipe. Make sure that you lift it straight up so that the bolts don’t fall into the bowl and damage the toilet.
How to Install a Toilet Tank
Once the old tank has been removed, it’s time to install a new one. First of all, you need a toilet tank that matches the size of your gasket. The gasket is the main hole on the toilet bowl that connects the toilet bowl to the tank. To figure out the exact size of the gasket, measure its radius precisely so that you can buy a tank with the same hole size. There are also universal tanks that can fit any type of toilet bowl, but they may be a bit pricier or unavailable in your local hardware shop.
Another detail you’ll want to think about is the color of the tank. It should match the color of your bowl so that the two seem like the parts of the same set.
Once you have your tank ready, it’s time to install it. Here’s how.
Push the Gasket Inside the Tank
In the package of your tank, you will also find a rubber gasket that should be placed onto the hole on the bottom side of the tank. Place the tank on the floor and turn it upside down so that the hole is facing you. Then, push the gasket onto the hole and make sure that it forms a tight seal. In case there is no gasket, you can purchase one in the hardware shop.
Place a Rubber Washer on Each Bolt
You should also find all the bolts and rubber washers inside the package tank. Push one washer onto each bolt and make sure that they are tightly pressed on top of the bolts. This is important as these rubber washers prevent leaking by forming a seal on the bolts.
Set Up the Tank
Now place the tank on top of the bowl and make sure that all of the holes are lined up. Lift it up carefully, holding the tank with both of your hands, and put the tank on the backside of the bowl. The gasket of the tank should be lined up with the hole on the back of the toilet bowl. Also, the bolt holes need to be lined up, so that the bolts slide through with ease. Make sure that the tank is set in place so that it doesn’t slip before you secure it.
Tighten the Bolts
The next step is to feed the bolts from inside the tank through the holes in the bottom. Hold the tank with one hand, and use the other one to feed the bolts from the inside. Press their tops to make sure that they are tightly sealed with rubber washers and the tank bottom. Don’t let go of the tank just yet, as it still may fall at this point.
Double-check whether the rubber washers are properly placed inside the tank as you place the bolts inside. Otherwise, the toilet may leak.
Secure the Tank
Each of the bolts should have a washer also from underneath the tank. When you finish guiding the washers onto each bolt, screw in the nuts that come with the tank tightly. Make sure to go clockwise and that they are tightly secured. If you’re not sure about your hand grip, use a pair of pliers for tightening.
Then, use a level to check whether the tank is really lined up and whether it’s leaning or tilting anywhere.
If it is leaning to the side, you’ll need to loosen or tighten the nuts and check again.
Fill Up the Tank
Once you’re sure that the tank is set in place tightly, you can fill it up with water. This may cause some anxiety, as nobody wants a flooded bathroom, especially when you’re so close to wrapping it up.
First, clip the small plastic tube (also known as the refill hose) to the top of the flushing valve. The flushing valve is a tall column located in the middle or on the right side of the tank. If you’re not sure how to install it, consult your installation manual. Depending on the type of toilet and type of tank you are using, there might be some special instructions on how to do this.
Now, connect the refill hose to the port located at the bottom of the tank. Screw it onto the threading until it’s tight. Watch out to not break anything.
Finally, let water flow once again by rotating the tightened valve clockwise this time. As you rotate it, the water will start filling up in the tank. Observe the tank and the hose for any leakage. If there is any, you will need to go a few steps back and repeat the procedure. Pay special attention to the bolts, supply hose, and gasket below the tank. If there is no leakage, place the lid on top of the tank, and voila – you have a new toilet tank.
If there is leakage and you can’t fix it, you should consider calling the plumber. It’s possible that the problem is not about installation but something else that requires professional attention.
Conclusion
Replacing a toilet tank is no rocket science. With a bit of effort, anyone can do it. If you’re inexperienced with this kind of DIY house project, it might be good to have a helping hand around. The supplies you need are the new toilet tank, level, screwdriver, pliers, and a wrench—also this instruction manual. And maybe also take a look at this helpful video to make sure that you get it right.


