Cleaning a toilet might be the least popular chore you have at home. You never really know what you might find lurking under the seat or around the base of the fixture that you have at home.
When you are armed with the best cleaning products to disinfect with, then the chore can be finished quickly and easily. You can even use cleansers that drop into the tank or affix to the side of the bowl to reduce the amount of work that you need to do.
If you’re ready to make life a little easier at home, then it’s time to invest in the best cleaning products today.
Chart for the Best Cleaning Products
Have you seen those elaborate guides and videos where you go step-by-step through the chore of cleaning a toilet?
This process is quite simple. You need to have an excellent bowl cleaner, a sturdy brush, and then something to tackle your tough stains.
Then add a drop-in cleaning product to reduce make your future cleaning efforts easier too.
Grab one of the products below if you’re running short on supplies, and you’ll be pleased with the results you can achieve.
Best Bowl Cleaner |
Best Toilet Brush |
| Clorox Variety | OXO Good Grips |
|
 Click for Price |
| Our Rating: 4.7 | Our Rating: 4.5 |
| Market Popularity: Medium | Market Popularity: High |
Tough Stains
|
Leave-in Drop-in
|
| CLR | Astonish |
|
|
| Our Rating: 4.4 | Our Rating: 4.1 |
| Market Popularity: High | Market Popularity: Low |
What Is the Best Bowl Cleaner?
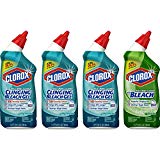
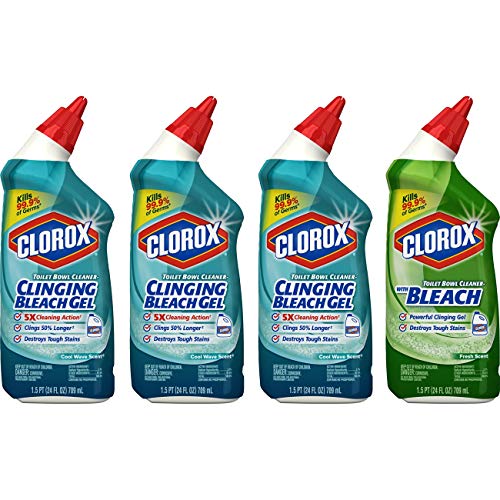
 Clorox Variety Pack
Pros:
- Disinfectant
- Gel Design
- Fresh Scent
Cons:
- Stains Clothes
Clorox makes a fantastic cleaning gel that will help to get your fixture clean surprisingly fast. You’ll be able to deodorize the interior during the process as the grime just wipes away after you let this clinging product sit for a few minutes.
It is a non-abrasive product that will make sure that your toughest stains can disappear with a minimum amount of work. The cleaner can kill up to 99.9% of the bacteria that is present, helping the bowl look as shiny as it did when it was a brand-new product.
The shape of the container helps to make sure that you can get the cleaner underneath the lip of the bowl where the water comes out. It dispenses easily, sits nicely upon placement, and then flushes away quickly 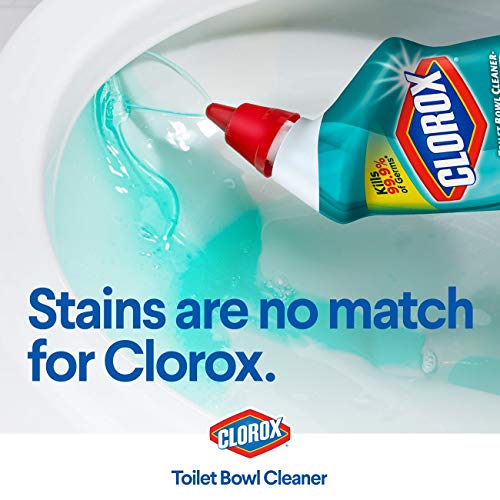 once you get some scrubbing done. Just squeeze on the bottle where indicated to open the cap, and then you’re ready to start the chore. It takes about 6 ounces of gel to clean the interior of the average bowl.
One of the nicest features about this cleaner is that the scent it offers lingers long after you’ve finished your work. It doesn’t have a harsh chemical smell like some cleaners, but it still does the job you expect it to do.
Like most toilet bowl cleaners, you must keep this product away from your eyes. It can also cause irritation on your skin with exposure. You’ll want to wear gloves when applying and scrubbing with this product.
This product is rated as being safe on septic tanks. Click here to compare prices on Amazon and find the best deal on the Clorox Variety Pack.
The Best Brush to Use
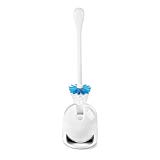
OXO Good Grips

Pros:
- Holding Canister
- Handle Shape
- Compact
Cons:
- Durability
OXO makes an excellent toilet brush that will reduce the strain on your back and neck when leaning over to scrub your bowl. Instead of offering a cylindrical design like their competitors, this item offers a tapered head that makes it a lot easier to scrub underneath the rim.
The shape of the handle for this brush is excellent as well. It fits nicely in your hand with a comfortable grip that doesn’t move or rotate when working. Even when you have gloves on that are a little wet, you can still have a strong grasp on this product.
You don’t need to rotate the brush in the bowl when cleaning thanks to the design it offers. There are blue bristles along the area next to the handle base that are tougher to handle the stains and debris that can collect underneath the rim. Just work the brush around the bowl naturally, lifting up for a good scrub there, to create a surprisingly clean experience for almost any cleaner you prefer to use.
After you disinfect the brush after cleaning, it is possible to replace this item in its canister. It offers a drip tray that includes ventilation slots that allow the water to evaporate as it collects. The storage footprint for this item is quite compact as well, allowing you to place it almost anywhere in the bathroom so that you’re ready to start cleaning when the time is right. Click here to compare prices on Amazon and find the best deal on the OXO Good Grips.
What is the Best Product for Tough Stains?
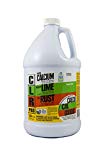
 CLR
CLR

Pros:
- Non-Toxic
- 500+ Uses
- Septic Safe
Cons:
- Needs Elbow Grease
If you have tough stains, then the first option you will want to try is a pumice stone. Many of the calcium, lime, and rust marks that develop in a bowl will disappear with a little scrubbing. When that option doesn’t work, this is the cleaner that you will want to use.
Choose the 1-gallon bottle for the best value. CLR Pro is manufactured in the United States, providing you with an option to dissolve some of the toughest deposits that can collect on your fixture. It is also part of the Safer Choice program, making it an ideal solution for those who have a septic system to maintain.
If a soak and scrub still doesn’t take away the tough stains, then you’ll want to remove the water from the bowl. Then place something in the drain that will prevent the cleaner from escaping down the trap. Pour enough CLR into the bowl to cover the stain completely.
Then let the product sit for about 30 minutes. Use your favorite brush or pumice stone with the cleaner still in the bowl to scrub at the stain. You should see some progress at this point. If it doesn’t disappear completely, then allow it to soak for another 30 minutes and repeat.
You will find that the versatility of the cleaner, along with its safe chemistry, makes for a wonderful combination to use in your home. It really does solve the hard water problem. Click here to compare prices on Amazon and find the best deal on the CLR Pro.
Best Drop-in Cleaning Product
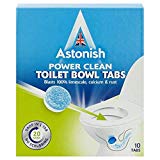
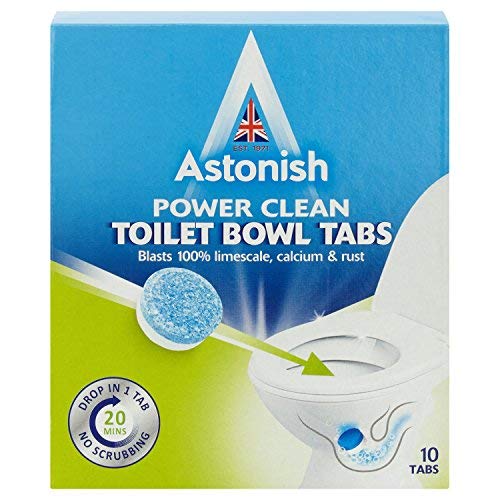
Astonish
Pros:
- Removes Scale
- Foaming Action
- Ease of Use
Cons:
- Interactions
The best way to combat the effects of hard water in your home is to use a proactive limescale remover. Once you remove the existing stains, you will add this drop-in product to help your bowl feel fresh.
The instructions for this product have you dropping a tablet directly into the water in the bowl. Then let the product percolate for about 20 minutes before you flush the item down the drain. It is such an effective product that it can clean all the way down to the U-bend in your trapway.
Although you might be tempted to drop one of these tablets into your tank, the foaming action of the cleaner is strong enough that it might bubble over.
Once you’ve finished cleaning with it, the product continues to fight against limescale deposits until you’re ready to clean the next time thanks to the 5% anionic surfactants that the product contains. When the foaming action occurs, the active ingredients ionize to create a negative charge. These items bind to the positively charged particles that you want out of your toilet, allowing you to flush them right down the drain.
If you flush the product too quickly, then the results are suboptimal. It also doesn’t work on hefty stains that require scrubbing. It will handle your weekly cleaning needs with regular maintenance to reduce your cleaning chores.
Cleaning a toilet isn’t rocket science. It is also something that many of us would prefer not to do if we had the choice. Consider these products today with the cleaning tips shared above as a way to maintain a happy bathroom without putting in all the work! Click here to compare prices on Amazon and find the best deal on the Astonish Toilet Bowl Tabs.
Gather Your Supplies
There is nothing worse than discovering that you don’t have all of your supplies ready when you’re in the  middle of a cleaning task. If you want that fixture to shine after finishing the work, then here are the items that you will want to have nearby.
• Disinfecting sprays or wipes
• Paper towels
• Strong cleaning gloves
• Your preferred toilet bowl cleaner
• Toilet brush
• Pumice stone
Then make the outside sparkle before you start working on the dreaded bowl. Take your disinfectant and give the fixture a solid spritz. Make sure that you give the back of the base and the underside of the seat a good spray too.
Once you have the fixture wet with your disinfectant, then walk away from the work for a little bit. If you spray and wipe away immediately, then you won’t kill any of the germs. Give the product about five minutes to work for the best possible results.
While you are waiting, you can begin to work on the interior.
Cleaning the Inside
The strongest cleaners on the market today are that way because the water in the bowl tends to dilute their power. One of the easiest ways to create a better scrubbing experience in the bowl is to remove the water before you start to clean the interior of the unit.
You can then use a cleaner that is milder while obtaining the same results. It also means you will require less work to produce similar results.
Turn the water valve off at the base of the fixture. Then flush and you’re ready to start working.
Apply the best cleaner to the interior, using a generous amount that will also get underneath the rim of the bowl. Remember that the product needs at least five minutes to disinfect the area.
Now you’re ready to move back to the exterior.
Getting the Best Results
Although disposables are an item that we all try to avoid when cleaning, a sturdy paper towel is an asset to have when cleaning. Using a wet cloth will not be as effective.
Take your paper towel, wipe off the disinfectant, working from the top to the bottom. Then run a clean paper towel around the floor and walls next to the fixture to ensure you get all of the germs.
Even people with good aim sometimes miss and this process will make sure there aren’t any lingering germs in the bathroom. Then make sure that you toss all of the dirty paper towels into the trash instead of allowing them to accumulate next to you.
Scrubbing Down the Interior
The best brush is going to help you begin to remove the stains that start to develop in the bowl and drain. If you notice that there is a ring of rust in there, then the minerals in your water supply are responsible for that.
Attack the waste particle stains with the brush. You can scrub out the rusty stains with the pumice stone. It helps to have one that is on a stick so that you’re gloved hands aren’t coming into contact with the chemicals on the surface.
It usually takes a few swipes to get rid of the stains. Pumice is a softer stone than the porcelain, so it won’t scratch the surface.
Give it one last scrub with a stiff-bristled brush. Then you can turn the water back on at the valve. Once your tank is full, you can flush again to rinse the bowl.
Remember to Sanitize Your Tools!
You now have a wet scrubbing brush on your hands. What are you going to do with it?
You should prop it under the seat cover, and then pour a cleaning solution over the bristles so the liquid goes into the bowl. Let the tool sit for a minute or two. Then run some warm (not hot!) water over it.
The brush must then air-dry to remove the germs that are on it. Sticking it back in its container is a recipe for some bad news the next time you need to clean.
It helps to wash the gloves with soap and water before taking them off as well. Then hang them up to dry. You can even slap one of them with a high-five because now you’re finished with your cleaning.
Finally if you’re finding your old toilet difficult to clean it might be simply time for a new one. Check out our toilet reviews here.


