If you like the idea of having a better clean available to you than what toilet paper can provide, then a bidet is your best option. Although you could use flushable wipes, some of them are not friendly to septic or wastewater treatment systems.
Instead of going through the cost and remodeling work to install a freestanding bidet in your bathroom, you can choose a new toilet seat that comes with this option attached. Most are priced between $150 to $300 and offer the same supportive outcome that the traditional models offer.
Here are the steps to follow when you’re ready to install the new bidet seat.
Step 1: Turn off the water supply valve.
Make sure that the valve is turned to the off position. Then you will want to flush your toilet to remove any additional water in the bowl.
Step 2: Remove the old toilet seat.
Bidet seats will replace your current toilet seat. That means you’ll need to remove the old one first. Remove the nuts and bolts that are holding the seat in place. Then make sure that you spend some time cleaning the top and bottom of the mounting area before proceeding to the next step.
Step 3: Attach the bidet seat mounting plate.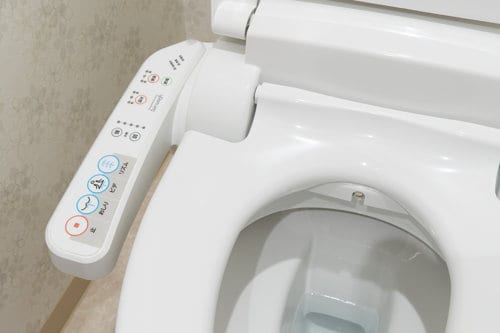
Unlike other toilet seats, the bidet will sit on a mounting plate on your toilet. This design covers the mounting area. Line up the brackets with the bold holes, and then place the mounting hardware in place. Tighten them to secure the plate to your toilet.
Step 4: Install the bidet seat.
Now slide the bidet seat onto the mounting plate that you just installed according to the manufacturer’s instructions for the product. Most will just move into position by clicking into place. You may discover that your mounting plate doesn’t align the seat with the bowl very well at first, so you can loosen the mounting hardware to slide it into the correct position. Then tighten the hardware once again.
Step 5: Connect the water supply.
Next, unscrew the flexible supply hose from the toilet tank’s fill valve. Do not remove it from the water shut-off valve. Then screw on the T-valve that came with your bidet seat where the water supply hose connected. Once you have created this connection, then attach the hose that supplies fresh water to the T-valve. This structure makes it possible to fill the tank on the toilet while supplying water to the toilet seat.
Step 6: Test your new setup.
Now that all of your steps are complete, it is time to test out the new bidet seat. Turn on the water supply to check for leaks. Make sure your GFCI outlet is working as it should. Test out each feature to ensure that it works correctly.
After all the steps above, you will have successfully installed a new bidet seat that will help you to feel cleaner and fresher with every visit to the bathroom. For recommendations on which bidet seat is the best for you, check out our review here.


